


One of the first experiences Jordan and I had in Sicily was visiting an agriturismo. At the time, I don’t think I fully understood what an agriturismo really is (we were visiting for Maddie’s birthday). So, we recently paid another visit to Murgo with our friends Rachel and Aaron. This post is all about the agriturismo experience; one you won’t want to pass up if you visit Italy!
So, what is an agriturismo? Basically, agriturismi (plural) are working farmhouse Bed & Breakfasts (e.g. “farm-stays”). That is, an agriturismo is an independently-owned farm that you can stay in while visiting Italy. Thus, the owners of the “hotel” or agriturismo, are primarily farmers and your room is in the farmhouse or somewhere along the grounds. This all sounds very “unofficial,” however, agriturismi are legitimate businesses and some can be quite fancy! If you want to know the basic historical rundown, essentially, the Italian government began providing tax relief for family farms that opened their doors to visitors in 1985. However, to be legally considered an agriturismo, more income must be generated from farm activities than the B&B.
I have to admit, I have not actually stayed overnight at an agriturismo. Perhaps we will do this later in Tuscany! However, there are so many near our home that I have made several visits for what I consider to be the best part – the food. As they are working farms, the food is local (most from the farm) and AMAZING!! We have been to several agriturismi, and the food has ranged from 30 to 50 euros per person. This includes all courses of a meal. The menu is pre-planned. Some agriturismi serve meals family style (like Murgo) or individually (like Barone di Villagrande). Some include full bottles of wine or wine tastings from the farm’s winery. It all just depends on where you go!
The one thing that I must note is that agriturismi are generally not conveniently located. Since they are working farms, they are usually out in the country. Thus, transportation to-and-from may be difficult to coordinate. Therefore, planning ahead is essential (I always reserve, even for the meal). However, they agriturismi I have been to have been 100% worth the trouble!!
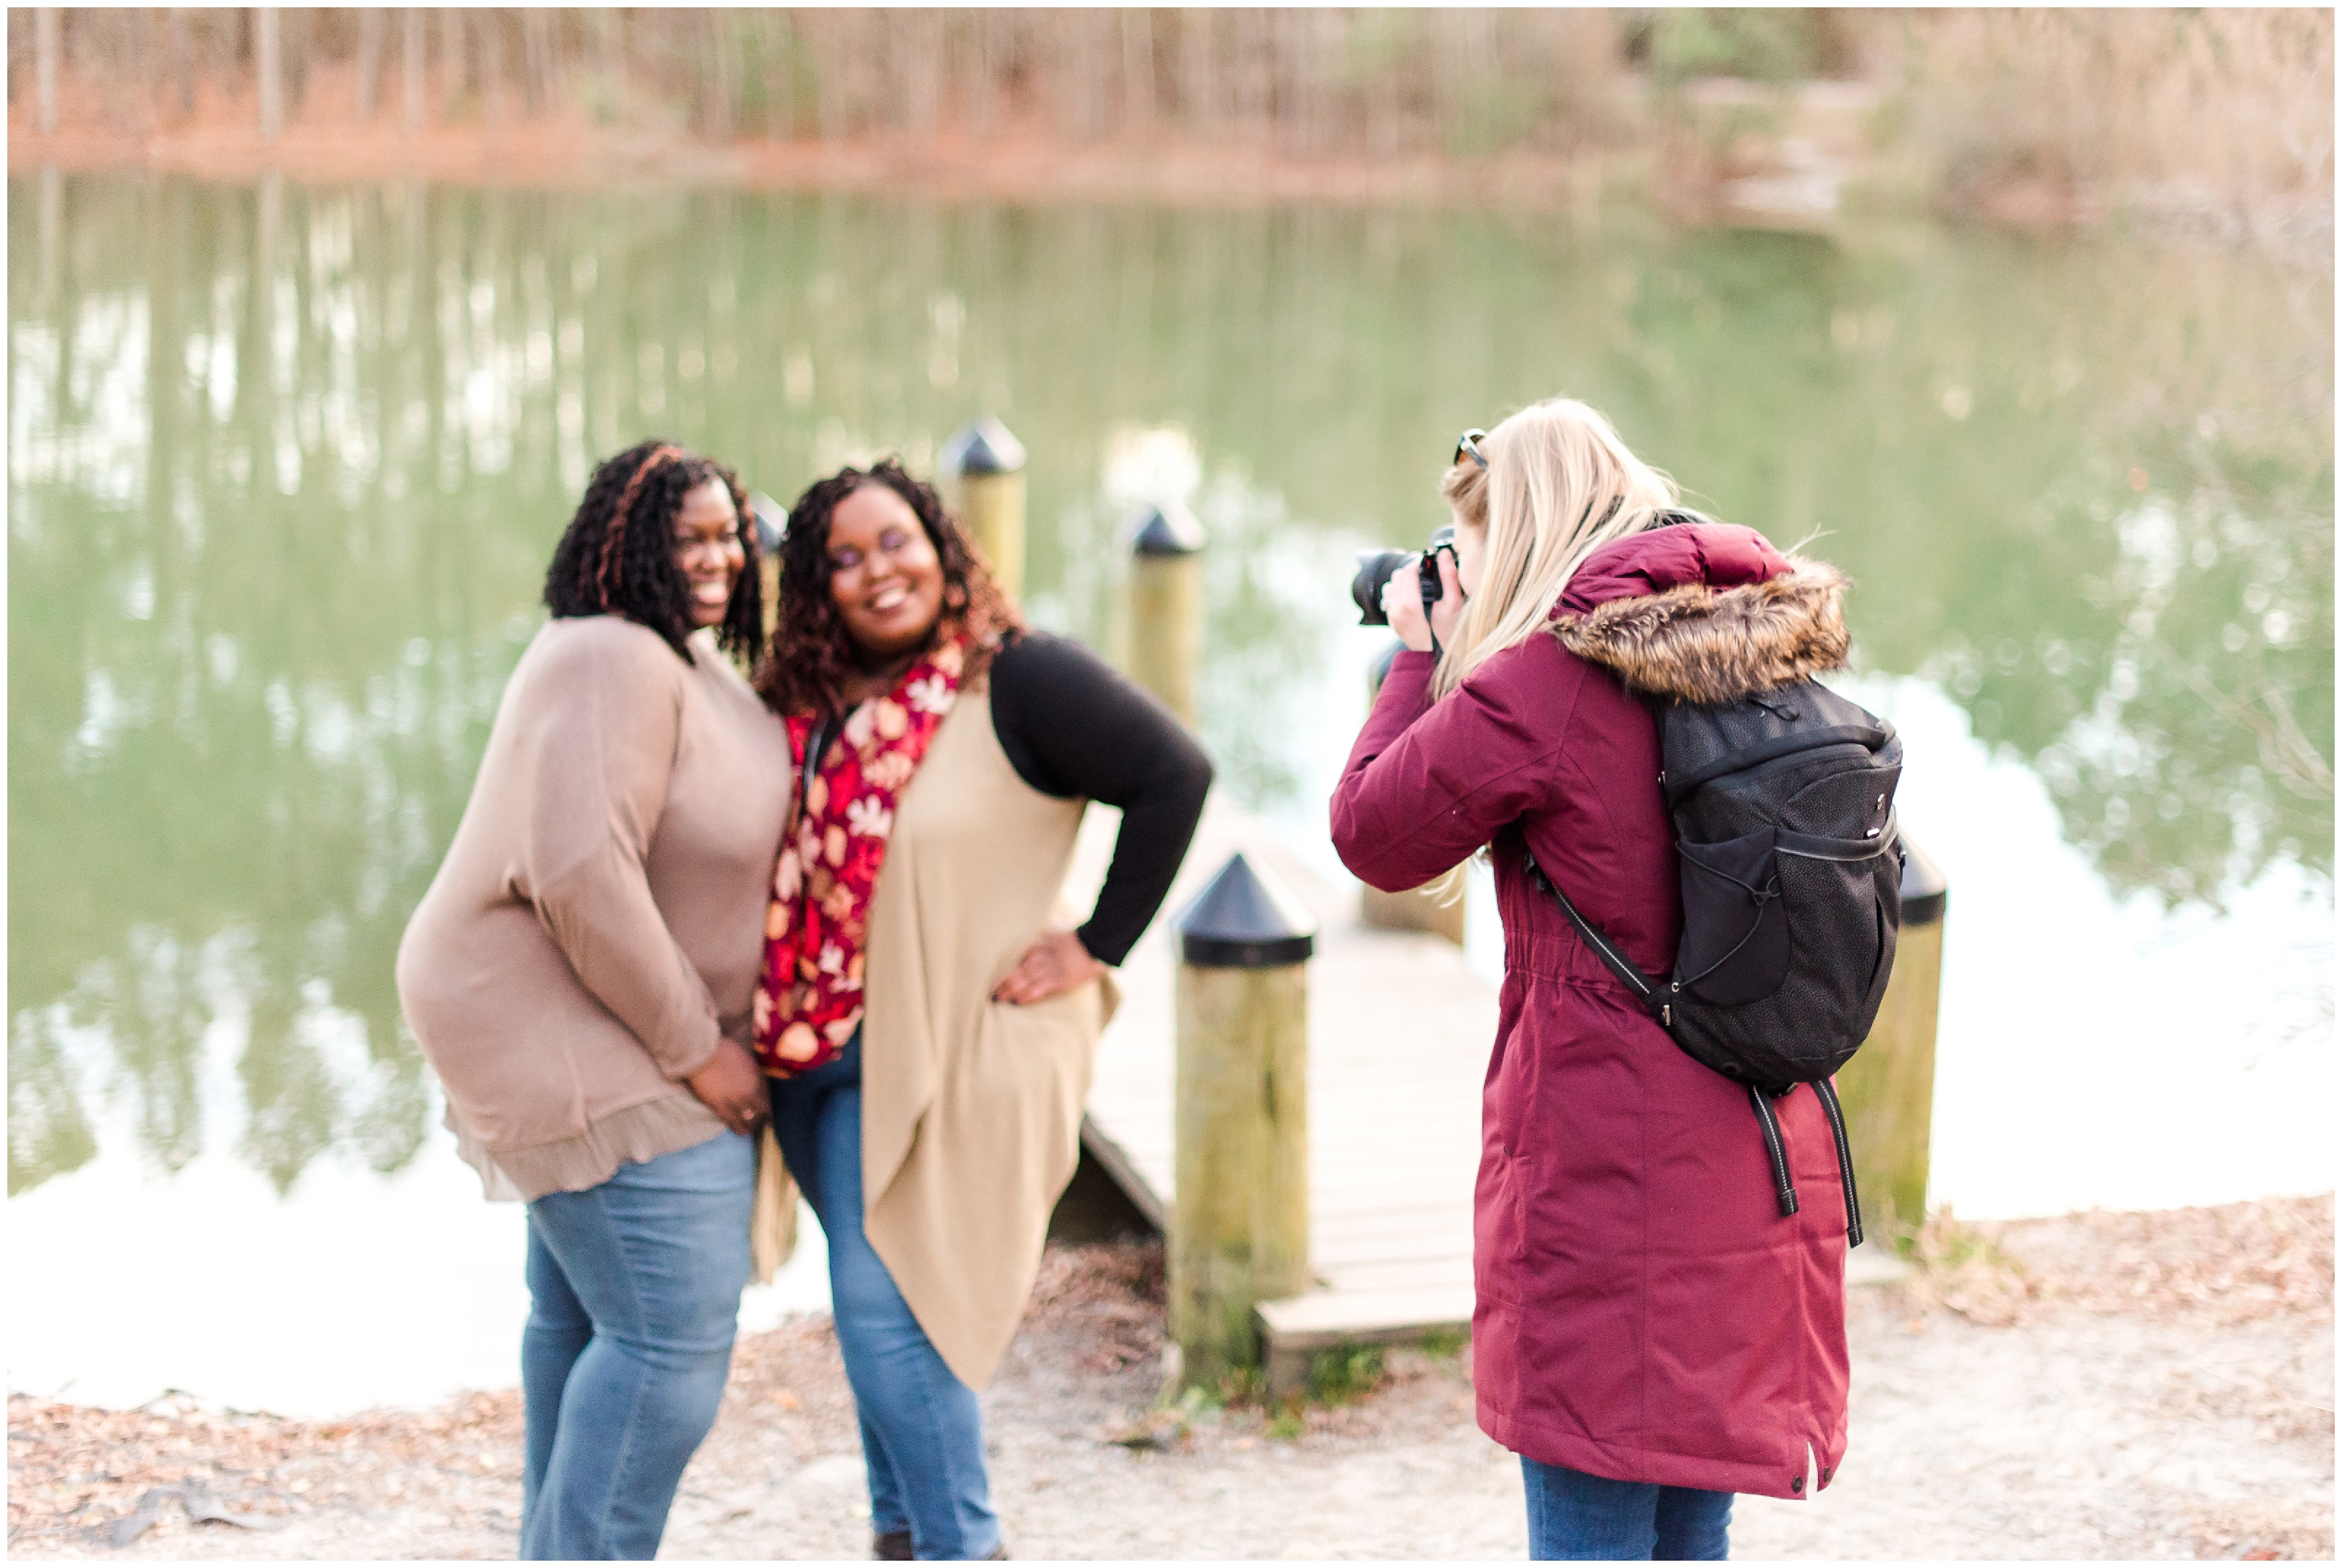
I snapped a few shots of our HUGE meal at Murgo so you can see what 35€ got us (spoiler: a lot!!!) We also spent some time casually wandering around the grounds with Rachel + AJ, so I’ve also included a few shots from our impromptu photoshoot. Enjoy!
Our Meal at Murgo Agriturismo


Murgo


Rachel + AJ’s Impromptu Photoshoot


The question “what should I wear?” is definitely something I get asked all the time! In December, I posted some general beauty tips to assist you in answering a lesser thought about portion of this question. Today, I am going to talk one of the more common potions – styling and attire!
As I mentioned in the first part of this series, these tips don’t apply to professional shoots only – you can totally use these for selfies!
Check out my top N I N E style tips below!
9. Pick colors that reflect your vibe.
I often recommend lighter, more neutral colors to clients. Colors such as muted tans, heather grays, subdued blues, or soft pinks, help to bring more of the focus to your face than those that are bold or bright. Think of someone wearing a neon shirt – it’s going to be much harder to focus on their face! Neutrals also have the benefit of coordinating well with almost any environment.

8. Watch out for tiny patterns.
Tiny patterns such as pinstripes do not show up well on camera. They actually can look kind of funky in photographs, so this is something I’d definitely recommend skipping, even if you love them! They just won’t show up well on camera, and you’ll miss out on that wow-factor that is present in-person.

If there will be multiple people in the photo, and one of them is planning to wear a pattern, the other person should be dressed in a solid, coordinating color. Wait! What does “coordinating” mean? Well, look no further than…
7. Coordinate, don’t match!
Matching is an instance where you are both wearing the same “main” color. Don’t do it!! Coordinating is much more flattering. To coordinate, you want to ensure you are not wearing the same “main” color on the top or bottom as the other people in your photo (think different color shirts from one another AND different color pants, skits, etc.). If you are taking a photo solo, then this applies to coordinating your accessories. Each person should wear a different “main color,” but the same “supplemental color(s).”
For instance, if I wear a light mint green dress with nude heels, my husband could wear a navy polo with tan pants. Here, my “main color” is mint, my husband’s is navy and the supplemental color (that we are both wearing) is nude/tan.
However, varying shades of the same color does count as coordinating (see below).

6. Texturize!
I’m talking sequins, lace, fur, tulle! The addition of textures into your attire can enhance your photos by giving them more depth.

5. Don’t forget about accessories!
Hats, scarves, statement jewelry, earrings, belts, bracelets, etc. These are the little details that really enhance your style. Accessorizing gives you an extra added pop and helps to finish off your look.
.jpg")
4. Choose clothes that flatter your best features.
Self-conscious about a certain part of your body? I think we all are! Select an outfit that flatters your body type, not just the latest trend. Outfits with some fabric on the arms creates a slimming effect, whereas strapless tops do not. Likewise, heels help to elongate the leg. Dresses and skirts, especially floor length, flatter every female body. Concurrently, pants flatter all men.
.jpg")
3. Don’t be afraid to dress up.
Feel like you don’t really have an occasion to get “fancy?” Here you go! It may initially feel like it’s “too much” if it’s not your usual style, but go for the elaborate dress or dapper suit! This is a situation in which you can never be too dressed up.
.jpg")
2. Consult/hire a professional hair and make-up artist!
I know… we’ve already talked about this one. But it’s just so important, I couldn’t leave it out!!

1. Be yourself!!
If wearing a dress isn’t really you, don’t wear a dress! Photos should capture the uniqueness of YOU!

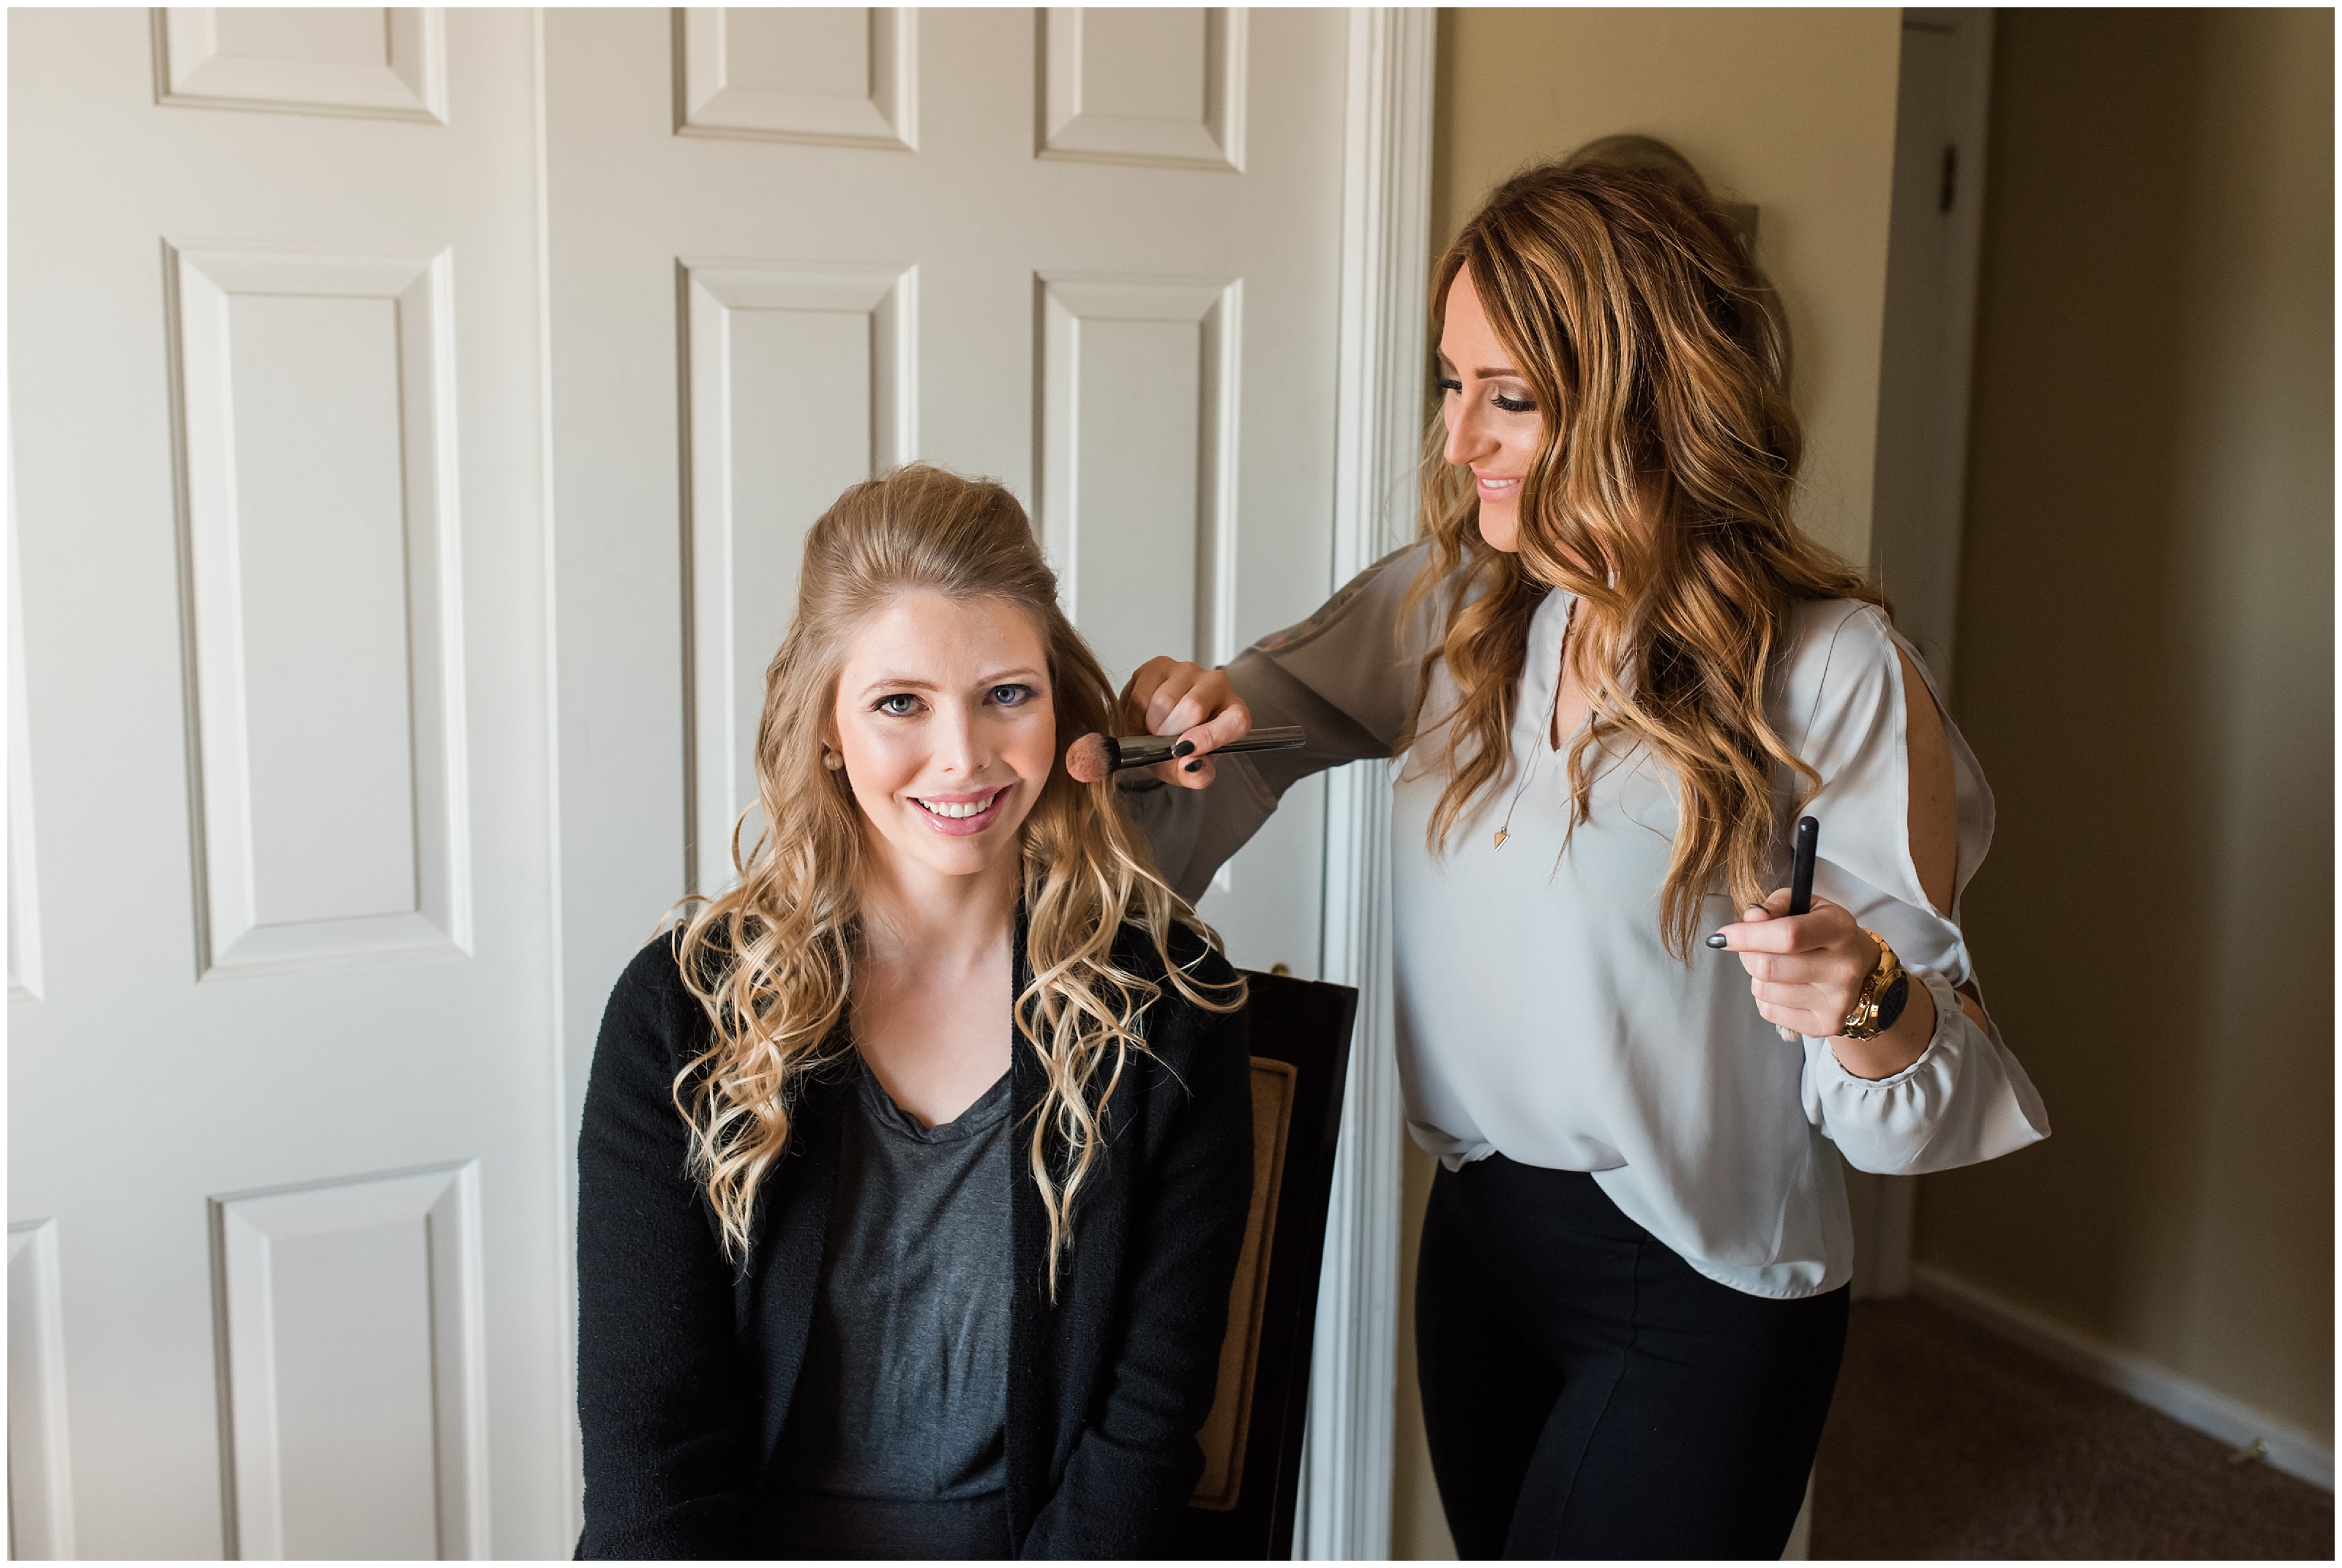
People always ask me about what to wear to their photo session, but they rarely inquire about beauty tips (i.e. how they should style their hair and make-up). Professional hair and make-up is always on the top of my list as a photographer and as a client myself. Not only does it look amazing on camera, but having your hair and make-up done for you feels AMAZING! Seriously. You will walk away feeling like a million bucks!
Recently, I had my own hair and make-up session with Jess Barbini of Jess Barbini Hair & Makeup Artistry (catch her on IG here). She is such an incredible hair and make-up artist and has seriously changed my life with her remarkable make over skills. As she was prepping me for my photo shoot, I asked her if she would mind sharing some beauty tips for general photo session prep.


Here are a few words of advice from Jess:
General Beauty Tips:
• Whiten Teeth
• Wax eyebrows at least 3 days prior
• Exfoliate 1-2 days prior
• Get a manicure
• Skip the spray tan
• Hydrate – drink lots of water!
• Prevent inflammation – Place an ice pack on eyes before sleep
• Get 8 hours of sleep

Why Hire a Hair and Make-Up Artist?
• Treat yourself!
• One less thing to worry about – Helps de-stress
• Look your best
• Professionals know how to prepare you to be in front of the camera.
• Confidence. It’s always the best accessory.

Check out my final look:

I absolutely recommend hiring a professional hair and make-up artist when investing in photos you’ll cherish forever. I personally never book a professional session without one!